Thursday, August 30, 2018

Munich Eats

I have been coming to Munich a couple of times the past few years, but I never had the chance to explore since we always spend a few hours either before or after our flight, as it is our hub of travelling to Austria or Tegernsee for my treatments.

This time however, we had a whole day to spend (around 8 hours) before our flight back home, so we were able to shop and explore to find those amazing healthy restaurants that I am about to share with you!


Gratitude Eatery

Gratitude Eatery is located on Turkenstrabe street. This street seemed to be in a university area as there were many youngsters and very cool hip shops. We arrived to the restaurant at around 1pm, and even though it was not a weekend, it was completely full. I figured it was probably because the food was so good, and i was totally right!!

I love their concept as they serve healthy, organic, gluten-free, vegan and refined sugar free foods. The whole menu was in German but we were lucky that the waiter spoke english and was able to translate the options we could have.

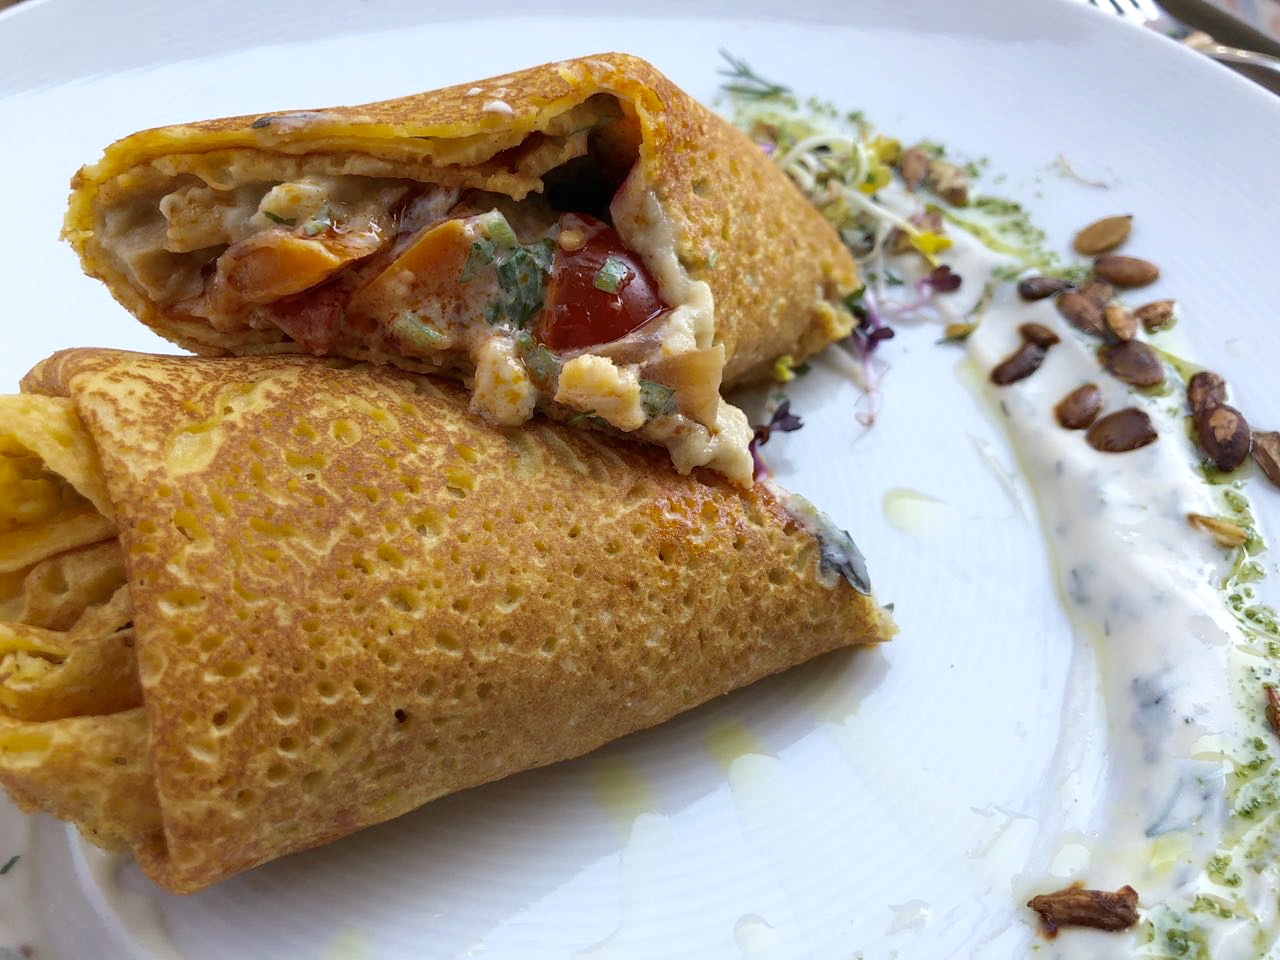
I ordered a crepe made of chickpeas, filled with marinated roasted vegetables and mouthwatering aubergine sauce. This meal was absolutely delicious! It was so good that I was thinking of coming back for dinner that same night!

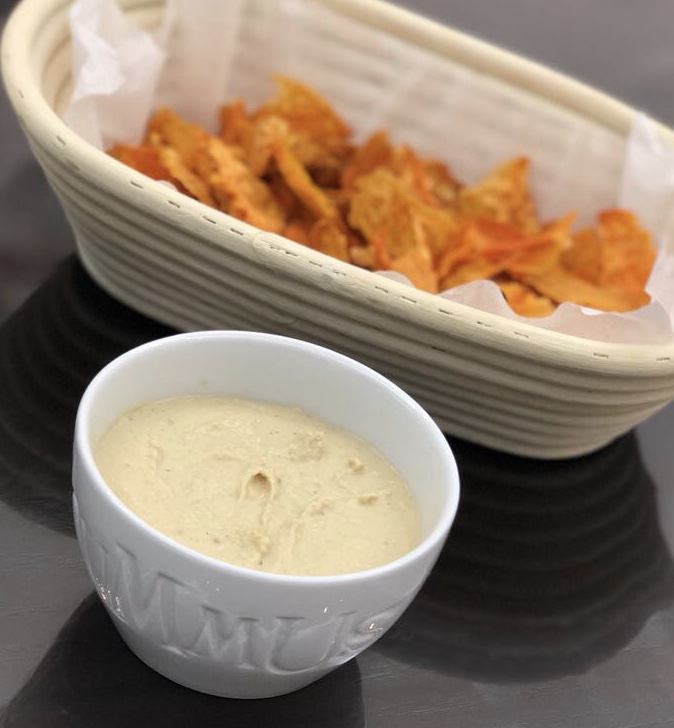
For desserts I tried their raw famous cheesecake that is sweetened only with dates, and it was really tasty. I definitely recommend anyone who visits Munich to try this place out to see how tasty healthy food can be.


Once we were done with our most satisfying lunch, we decided to walk around that street and I was thrilled at how many healthy spots were around me! I literally felt like I was at disneyland, i even went inside those restaurants to look around which was hilarious because almost everything was in German and I looked so lost and happy at the same time :D

Those are a few pictures of the many places on that street which I would have liked to try if I had more time and more space in my stomach!


Tushita Teehaus

After a lot of walking and shopping, I really needed some refuel for energy! We decided to go to Tushita Teehaus, they are known to have some guilt free treats and really good Matcha drinks.

I was still full from lunch, so I couldn't order anything to eat even though they had some tempting options. I ordered a cold Matcha Latte which was what they were most famous for. It certainly gave me the kick i needed :)


Max Pett

For dinner we went to a 100% Vegan restaurant called Max Pett. They are known for their healthy and delicious meals. They are famous for their vegan cheese platters and ice creams, but because of our time constraint we didn't have much time to try all what we wanted. I ordered their zucchini soup for starters and for main course I had the most delicious stuffed eggplant! The eggplant was filled with sunflower and mushroom to mimic minced meat and was topped with melted vegan cheese sauce which was really tasty. The meal was served with a side of rosemary potatoes and mixed salad.


That was the end to our trip. I felt very satisfied and slept well on the plane after a lovely day well spent in Munich with lots of shopping and healthy and nutritious foods that were delicious :)


What are your favourite spots in Munich? :)


Wednesday, May 23, 2018

Veggie Oat Soup

This Veggie Oat Soup is one of the soups which we like to include during Ramadan (month of fasting). It is an excellent option for both; Iftar (after breaking fast), and Suhoor (before beginning of fast). It is made with simple ingredients, easy to make, filling and delicious. Some like to add chicken or beef to this soup, but we make it vegetarian at our house. It is very versatile, you can add more vegetables if you want, and it will still taste good (we add diced green beans sometimes).

Oats is known for its many benefits which includes lowering cholesterol, maintaining insulin levels, and protecting against heart diseases. It is also full of fiber, which helps with digestion and keeps you full for longer. You can check out my breakfast/snack section for recipes  that include oats.

Most oats are grown and processed in facilities that process gluten containing grains such as barley and wheat, so that is why oats are not labeled as gluten free foods for possible contamination. However, they are safe for most people with gluten free intolerances. Nowadays, we can find many oats that are labelled gluten free which is safer especially for people who suffer from celiac diseases and can not tolerate even a small percentage of gluten.

I hope you enjoy this recipe as much as we do :)


Recipe (2-4people)

Ingredients
- 1 cup of oats (soak in water so its covered for at least 10 minutes. i like to grind it in my blender to turn it into flour so its faster to cook and more smooth but this step could be skipped)
- 2 medium tomatoes (blended)
- 1 carrot (peeled and grated)
- 1 big zucchini (peeled and grated)
- 1 small onion (diced)
- 1 clove of garlic (minced)
- 1 organic vegetable cube (i use kallo brand, you can find it at lulu) and sometimes I use homemade vegetable broth instead.
- 1 TBSP of oil (I like using avocado or coconut oil)
- 1 tsp of mixed bahraini masala powder / or mixed seasonings 
- salt & pepper to taste
- 1 TBSP parsley (optional)

Method
- On medium fire, sauté the onions and garlic.
- Add the vegetable cube.
- Add the grated zucchini and carrots.
- Add the oats with its water and stir well.
- Add the blended tomatoes.
- Add 4 cups of boiling water.
- wait for it to boil then simmer on low fire for 30 minutes until its soft and reaches your desired consistency.
- Add 1 TBSP of parsley before serving.

Squeeze some lemon to your soup (i sometimes like adding a bit of apple cider vinegar) and enjoy :)


Wednesday, May 2, 2018

Basic Hummus

Since I stopped dairy, Hummus has been my best friend! It saved me from many cravings and really helped me through my transition.

I absolutely love chickpeas! We use it quiet often at home not just to make hummus but for many other recipes. I love adding chickpeas to salads, making falafels and curry's with them. I also like to turn the chickpeas into flour with my blender to use the flour to make tortillas, crackers, guiltless treats and pizza crusts.

As I have mentioned before in my "chickpea mini pizza" post, the nutritional benefits of chickpeas are many. They are filled with fibre, high in protein, provide many essential vitamins and minerals. Chickpeas makes you feel full, boosts digestion, balances healthy cholesterol levels, protects against heart diseases and stabilises sugar levels.

This Hummus recipe honestly can not be easier! I sometimes add a bit of a steamed beetroot to make it into pink hummus or a bit of a steamed pumpkin to make it into orange hummus. It gives it a bit of a unique taste and is always nice to please children and guests :)


Recipe 
1/2 cup of boiled chickpeas
1 TBSP olive oil
1 TBSP tahini (check out the benefits of tahini in my Quinoa, Tofu & Avocado Veggie Bowl with Tahini Dressing blog post)
2 limes (juice)
A few pinches of himalayan/sea salt (to your taste)
1/2 tsp cumin
2 TBSP of water (sometimes needed to make it creamer and sometimes skipped)


Put all the ingredients in a blender


Blend for around 2-3 minutes. You might need to add water in intervals until it reaches to your desired consistency.


My favourite way to enjoy them is with my sweet potato chips, buckwheat bread or vegetable sticks. You can even add them to any meal to make it tastier :D

 
I hope you enjoy this Basic Hummus recipe as much as we do!

Saturday, April 28, 2018

Kale Chips

I love munching on something crunchy like chips. Recently there has been many new "healthier" and tempting options in the market, but i prefer to keep those for camping trips or as a last resort. At home, I like making fresh baked chips made from potatoes, sweet potatoes, asparagus, kale and beetroots. Recently, I have been really enjoying those kale chips which are so easy to make and delicious! You can enjoy munching on it by itself or even as a topping to your salad for some extra crunch :D

Kale is very low in calories, contains no fat and is high in fibre, iron, vitamins K, A and C. Kale is filled with antioxidants and is great for anti inflammatory and cardiovascular health.


Method

- Preheat the oven to 150c.
- wash and dry your kale very well with a tissue paper (you might have to cut them into smaller pieces depending on how big the leaves are).
 
In a bowl, add:
1 TBSP olive oil
1/2 lime (juice)
1tsp nutritional yeast (I've heard feedback that it still tastes good without, but i like to add it for the extra taste and nutrients).
1tsp tahini sauce (the secret ingredient!)
pinch of garlic powder
salt & pepper
Mix everything well.

- Add the kale in the bowl and soak in the sauce.
- Line them one by one on the baking tray so that they are not overlapping.
- Bake for 15 minutes then flip the kale chips and bake for another 15 minutes.

I hope you enjoy them as much as I do :)


Saturday, March 31, 2018

Almond Flour Za'tar Toasties

I have spoken about my love relation with Za'tar since I was a kid in one of my earliest posts. However to enjoy Za'tar, I usually have it with spelt/buckwheat chapatti's. I try to minimize using flours as much as possible, so this turned out perfect for us!

We love having those Za'tar toasties (I honestly couldn't come up with another name if you have any suggestions please let me know!) at home for dinners or as a snack. They also taste so delicious the next day. They are made with only a few ingredients, easy, fast to make and are kids approved :D

Ingredients
Almond Flour Toastie

1 & 1/8 cup of almond flour (I just process almonds in the food processor to make it into flour)
1 TBSP coconut flour
1/4 tsp baking powder
1/2 tsp mixed herbs
1/4 tsp sea salt 
3 TBSP flaxseed mixed in 1/2 cup of water - let the flaxseeds sit in the water for 15 minutes until its a gel like consistency (this is a replacement for eggs - you can use three eggs instead if you can have eggs, I haven't tried it though)

Za'tar Mix

2 TBSP Za'tar (i like getting mine from Wafi Gourmet in Dubai "baladi"type, or Za'tar mix from Lebanon)
1/2 TBSP Linseed oil
1/2 TBSP Olive oil
- you can use omit the linseed oil and use a tablespoon of olive oil, but i like to include linseed oil in our diet for its amazing nutritional properties.


Method

- Pre heat your oven to 177c.
- Mix all the dry ingredients in a bowl.
- Add the flaxseed mixture and the oil and stir with a spatula.
- Divide the dough into 10 pieces then flatten with a spatula and bake for 20 minutes.
- meanwhile make your Za'tar mix.
- Add the Za'tar mix and put it back for another 3-5 minutes until it looks crunchy enough for you.


Wednesday, March 21, 2018

Leek Soup

This Soup happens to be one of our favourites at home. I like to have soup on the table for our dinners so I like experimenting with different vegetables so it doesn't get boring.

Leeks benefits are very similar to the benefits of onions and garlics, which make this soup enhance those benefits since those three are the main ingredients. All three vegetables are linked to having cancer and diabetes fighting properties. They also reduce the risk of heart diseases, high cholesterol and high blood pressure.

Leeks are a good source for Vitamin A and K, folic acid and magnesium. This Leeks soup is delicious, filling, healthy with just a few ingredients and is super easy to make. I hope you enjoy it as much as we do :)


Recipe (2-3 people)

Ingredients
1 & 1/2 Leeks (thinly sliced) - I like to get organic Leeks from Al Meera
1/2 a medium onion (thinly sliced)
1 clove of garlic (crushed)
1/4 cube of the organic vegetable cube (maggie replacement)
Handful of chopped Coriander & Parsley OR leaves of a celery (both worked well)
Salt & Pepper (to taste)
3 cups of boiling water 

Method
- Stir fry the onions, garlic and leeks for a minute.
- Add the boiling water.
- Add the cube, salt & pepper.
- cover the pot and let it simmer on low for 20 minutes.
- Leave it to cool then transfer to your blender.
- Add the coriander/parsley or celery leaves.
- Blend and serve!


Monday, February 26, 2018

Chickpea Mini Pizzas

Chickpeas are an excellent source of protein. They are filled with fiber, high in protein, provide many essential vitamins and minerals, and have many nutritional benefits. Chickpeas makes you feel full, boosts digestion, balances unhealthy cholesterol levels, protects against heart diseases and stabilises sugar levels.

I love adding chickpeas to my salads, mixing them in with vegetables, making Hummus with them and recently using it as a crust to my mini pizzas :)

I try to avoid gluten and wheat as much as possible especially at home. So I use alternatives such as buckwheat, quinoa, nut flours, coconut flour, sweet potatoes and chickpeas. 

I have previously posted a pizza recipe made with sweet potato which I absolutely love! However, not everyone likes the taste of sweet potato so i tried grinding chickpeas in a food processor and blended it into flour and I must say it has been a success at home :D

Here is how I made it step by step with pictures to follow.

- Soak 1/2 cup of chickpea flour (grind up chickpeas in a food processor into flour) in 3/4 cup of water. Leave it to set for 30 minutes.


- Cook it like how you would cook pancakes. The batter consistency will be more watery though. I used a table spoon of the batter for each mini pizza.


- Cook for 2-3 minutes then flip.


- While the chickpea is soaking for thirty minutes at the beginning, start preparing your sun dried tomato paste (you will find it below in one of the previous posts). Keep aside.


-Sauté your favourite vegetables. I used red onions, bell peppers, mushrooms and sun dried tomatoes. Keep aside.


- Assemble the chickpea patties on a baking tray, put a teaspoon of the sun dried tomato paste on each followed by the sautéed vegetables.


- Add some olives.


- Sprinkle some nutritional yeast  (optional) then bake for a few minutes (around 10 minutes) at 220c.


Thats it!


You could even add zataar or vegan cheese for different variations :)


Enjoy!

Sunday, January 21, 2018

Candied Pecans

My pantry is always filled with healthy snacks. I love having a variety of snacks so whenever we are hungry we have options. I am also nuts over nuts :D I regularly make butters and flours from them with a food processor.

Nuts are rich in good fats,  low in carbohydrates, high in fibre and are a great source of several nutrients including vitamin E, Magnesium and selenium. They are also filled with antioxidants. Nuts are good for heart health because they may help lower total LDL cholesterol and triglycerides while boosting levels of HDL cholesterol. They are also a good source for people with type 2 diabetes and metabolic syndromes because it improves the blood sugar, blood pressure and also reduces inflammations. 


When I began my healthy journey I kept on trying to recreate my favourite things so I can enjoy them and it used to really surprise me every time i was completely satisfied with the healthier version. Now however, i don't get surprised anymore because i believe that healthy food can be tasty and i actually love the feeling of indulging guilt free foods.

One of my favourite types of nuts which i always used to like at carnivals and malls growing up were the candied ones that were sold on those little carts and smelt so good from miles away! I started making "healthier" candied nuts and they actually taste just as good but with better ingredients. I like making almonds coated with honey and sesame seeds sometimes but my favourite ones have to be those addictive candied pecans, whenever we make them at home they finish instantly!


I hope you enjoy them as much as we do :)


Recipe: (1 jar)
Ingredients 
2 & 1/2 cups of pecans
1/2 tsp cinnamon 
1/4 tsp salt
3 TBSP pure maple syrup
1 TBSP raw coconut palm sugar

Method

- Preheat the oven to 150c.
- Mix the pecans with the cinnamon and salt in a bowl.
- Add in the maple syrup and coconut sugar. Mix very well so the pecans are well coated.
- Place the pecans on a baking tray and bake for 15 minutes. Flip, and bake for another 5 minutes.
- Allow to cool completely before transferring to an air tight container.